Monday, October 3, 2011

How to Carve a Pumpkin 101

I told you in a previous post that I had to carve a pumpkin for my Public Speaking class and today was the day. The speech went well and I think everyone enjoyed my topic since it's pretty relevant to the season right now. Since I've given the speech and actually carved the pumpkin, I can share with you how I did it.

--How to Carve a Pumpkin with Cookie Cutters--


Tools you will need :
  • hammer/rubber mallet
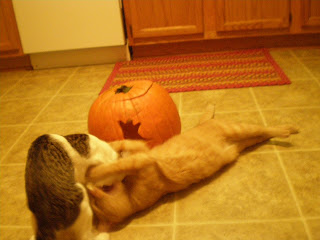
  • pumpkin (the kitten is good to have, but not necessary)
  • needle nosed pliers
  • large, sharp knife
  • small, sharp knife
  • scraper/spoon
  • cookie cutter shapes (stainless steel, rubber or silicon will NOT work)

    **There are pumpkin carving kits at WalMart for $.97 that include a small, carving knife and a scraper...you'll need both so I recommend getting this little kit.


    Step 1: Hollow out the pumpkin
               
    - cut the top off of the pumpkin by taking the large, sharp knife and cutting a circle around the stem of the pumpkin until you can pull the top off


    - take your scraper or spoon and get all of the ickiness out of the inside of the pumpkin

    before
    after

    **you can wash the seeds and eat them......here's a recipe you may want to try http://allrecipes.com/recipe/spiced-pumpkin-seeds/detail.aspx


    Step 2: Hammer in the cookie cutter shapes

    - lay the pumpkin on its side
    - hold the cookie cutter where you want it on the pumpkin
    - take the hammer or mallet and hammer in the cookie cutter evenly (if you don't hammer in each side a little at a time, it will put too much pressure on one side and it will break)
    - hammer it in as far as you can and then take the pliers and pull it out a little at a time


    Step 3: Cut out the shape

    - take your small carving knife and carefully cut out the shape the cookie cutter left
    - once it's cut properly, you should be able to push the shape into the pumpkin


    That's all there is to it. So simple. You can also put a candle in the bottom and you have a jack-o-lantern. Hope this is helpful for some of you!


    **I had to add some pictures of my precious kitties :)

    Kitten refused to stand still

    Millie is definitely meant to be a kitty model

    Fighting.....nothing new

    Now he poses....the second Millie walks away


    Happy Pumpkin Carving!

    Thursday, September 22, 2011

    Pumpkins Galore!!!

    I have to give a demonstration speech for my Public Speaking class on Oct. 3 but I couldn't think of anything that I could demonstrate that would be interesting and easy. I did come up with a few boring ideas like knitting (I'm not even really good at that, especially not good enough to explain it to someone else), how to make soap (which no one cares about), or how to tie a tie (I figured a guy would do this one). But, here to save the day was my CraftGawker app on my iPhone. I was scrolling through the different ideas one day in between classes and came across a wonderful idea for Fall, Halloween, pumpkin carving, and a demonstration speech topic.

    The idea is "How to Carve Pumpkins With Cookie Cutters." Maybe I'm the only one, but I've always wanted to carve a really neat pumpkin. I've never done it because I didn't think I was artsy enough to do so. In this project, the cookie cutter does all of the hard work for you. Wonderful!

    Since my speech isn't for another 12 days, I'll postpone this exciting event a few more days because I don't want my pumpkin to rot. I'm very pleased with this idea and I think it will make a great speech topic. I'll post pictures and details of how to complete the project when I actually do it. This is just a taste of what's to come....be excited!!!! :)

    If you want to get a head start on carving your own pumpkin, here is where I found the idea:

    http://www.freshhomeideas.com/entertaining---parties/halloween/halloween-decorations/carve-pumpkins-with-cookie-cutters 

    Happy Pumpkins!!

    Wednesday, September 21, 2011

    Crafty Katie

    I have recently discovered a new app on my iPhone called CraftGawker. If you have an iPhone, like crafts, and are a cool person you should definitely download this free app. It's all blogs that have super neat ideas. I've found so many good projects on it and have already started and completed a few.

     First, my new chalkboard obsession. I bought a pretty frame, that matched my kitchen cabinents, from Hobby Lobby along with a spray can of chalkboard paint. You simply take the glass out of the frame and spray it (OUTSIDE) with a few coats of spray paint, letting each coat dry before applying the next coat. Then you put the glass back inside the frame and you have a homemade chalkboard. Easy as pie.....although I've never really understood that phrase because most of the time, pie isn't easy to make.


    Next, I was having a serious space issue with my scarves. I have a ton of scarves and nowhere to put them (out of reach of kittens). I was scrolling through my CraftGawker app and saw someone had taken some household items and made a really neat rack for their scarves. I'm not THAT crafty so I thought about what I could get to substitute what this person had made and I realized it's very simple. A towel rack....from WalMart. It's working perfectly :)


    Lastly, my new obsession is Shutterfly. I've made 3 photo books, printed off a ton of pictures, and my latest creation are these precious magnets. Matt & I love to travel and on one of our trips I thought it would be a good idea to start collecting magnets from everywhere we go. Then I looked at the price tag on one of the magnets at a store and saw the outrageous price and I immediately changed my mind. But then I found on Shutterfly a place where I can make my own magnets from pictures I took with my camera. I love them and I think they're great memory keepers :)


    Times are a Changin'

    Hello all! I haven't posted on here in about 7 months which I think is reason enough to kick me out of the blogging world, but I promise to be better. I have a lot to update but I'll try and be brief. I think we left off in January when I had just discovered how to make Chicken Alfredo. A lot has happened since then.

    I don't remember anything too exciting happening in February so we'll start with March when my husband, Matt, turned 24. Yay!


    Also in March, a very, dear woman in my life, who helped take care of me when I was little, turned 100 years old and my family and I were able to celebrate this exciting event with her at her birthday party.


    After the birthday party, myself & my husband, my parents, and my brother & his wife (fiancee at the time) went to Wye Mountain and took family pictures amongst the Easter flowers. We had a wonderful time!


    That brings us to Easter, which is a very important event considering it's when we celebrate and remember Jesus's resurrection over death, hell, and the grave; but it was extra special this year because it was Matt and I's first Easter as a married couple :)


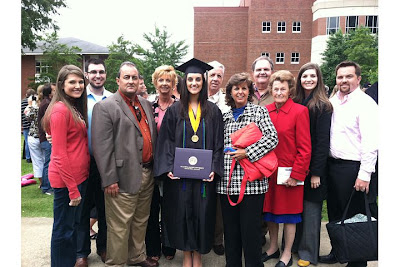
    We'll skip ahead to May 9 when my beautiful cousin, Lindsey Coffman Barber and her husband Ross, welcomed their first child into the world: Elliot Roslyn Barber. She is absolutely perfect and will never do any wrong...of course. My cousin Emily graduated from college! I finished my sophomore year of college also in May and then we took a MUCH NEEDED vacation to Outer Banks, North Carolina, June 16-25. It was extra special because two of Matt's sisters were there along with 4 of his nieces and nephews. We had such a great time together.

    Ellie Rose :)

    At Emily's graduation at OBU


    The beach house we stayed in on vacation in N.C.

    On the beach

    Again, on the beach, taking family pictures

    Paul & Kelsey (nephew & niece from Washington D.C.)


    Let's see....July. We adopted a new kitten named Millie, resigned as Youth Pastors from our church, had to move out of the parsonage that the church provides for the Youth Pastors, moved into a new apartment that his parent's own, and started a new chapter in our lives. Also, the most important day of the year falls in July on the 31.....our 1 year anniversary!!!! Hooray!!! We celebrated with dinner & a show at Murry's Dinner Theater in Little Rock, AR. Great time!

    Millie


    Matt & I at Murry's on our 1 year anniversary


    August: on the 6th, my brother, Tyler, got married to my new sister, Tiana, in a beautiful ceremony that I had the honor of participating in by being part of the bridal party. It was a such a fun weekend and I know that they will be very happy together. On the 24th, I started my Junior year of college at ATU. Cross your fingers that I'll only be there one more year after this :). On the 28th, I turned 20 years old...whoop whoop. And on the 30th, my wonderful parents celebrated their 26th anniversary.


    That brings us to September. I promise to post more than every 7 months and now that we're living in a new apartment, I've starting getting in touch with my newfound crafting skills. More exciting things to come :)

    Thursday, January 6, 2011

    Chicken Alfredo

    My Aunt Cindy and cousin Emily formulated this recipe. They graciously gave it to me and I decided to take a deep breath, a leap of faith, and try to make something that required more than 3 ingredients and no microwave; lo and behold...I did it, which means you can too.

    Here are the ingredients you will need:
    -3 small or 2 large boneless skinless chicken breasts
    -pasta of choice (I prefer farafelle, it's a mini bowtie)
    -2 cups heavy cream
    -1/2 cup butter (it's supposed to be unsalted but I can't really tell the difference)
    -1 cup grated parmesan cheese
    -2 to 3 cloves of garlic, minced (if you use the minced garlic in the jar, I do about 3 teaspoons full)
    -salt
    -pepper
    *extra ingredients I use: mushrooms, artichokes

    Directions:
    Cook chicken in a large skillet with butter or oil until light brown. Remove from skillet and cut into little pieces when cooled.

    In a separate pot, boil water and cook pasta according to package directions. After pasta is cooked, drain of all water.

    In the same skillet the chicken was cooked in, drizzle olive oil in skillet and add garlic over medium low heat. Sautee for 30 seconds then add heavy cream. Increase heat to medium. Heat until simmering, whisking occasionally. Add butter to cream and whisk to melt. After butter is melted, cook 2-3 minutes whisking heavily until sauce thickens slightly. Sprinkle in cheese and whisk to incorporate. Add salt and pepper to taste.

    (These are all the ingredients I used for the sauce.)

    Continue whisking sauce until all the cheese is melted. Add chicken (mushrooms and artichokes if desired). Stir in a few noodles at a time. You will NOT use all the pasta, if you do, it will be INCREDIBLY dry. Trust me. It is very important that you stir in small amounts of pasta at a time because once it's in, it can't come back out. Your finished product should look a little like this:

    It shall be delicious so prepare your mouth for a festival of flavor. The end.